
Your cart
There are no more items in your cart
- Vaporshop
- Wiedza o waporyzatorach
- 1 likes
- 21159 views
8 tips on how to properly use your DYNAVAP VapCap M vaporizer.
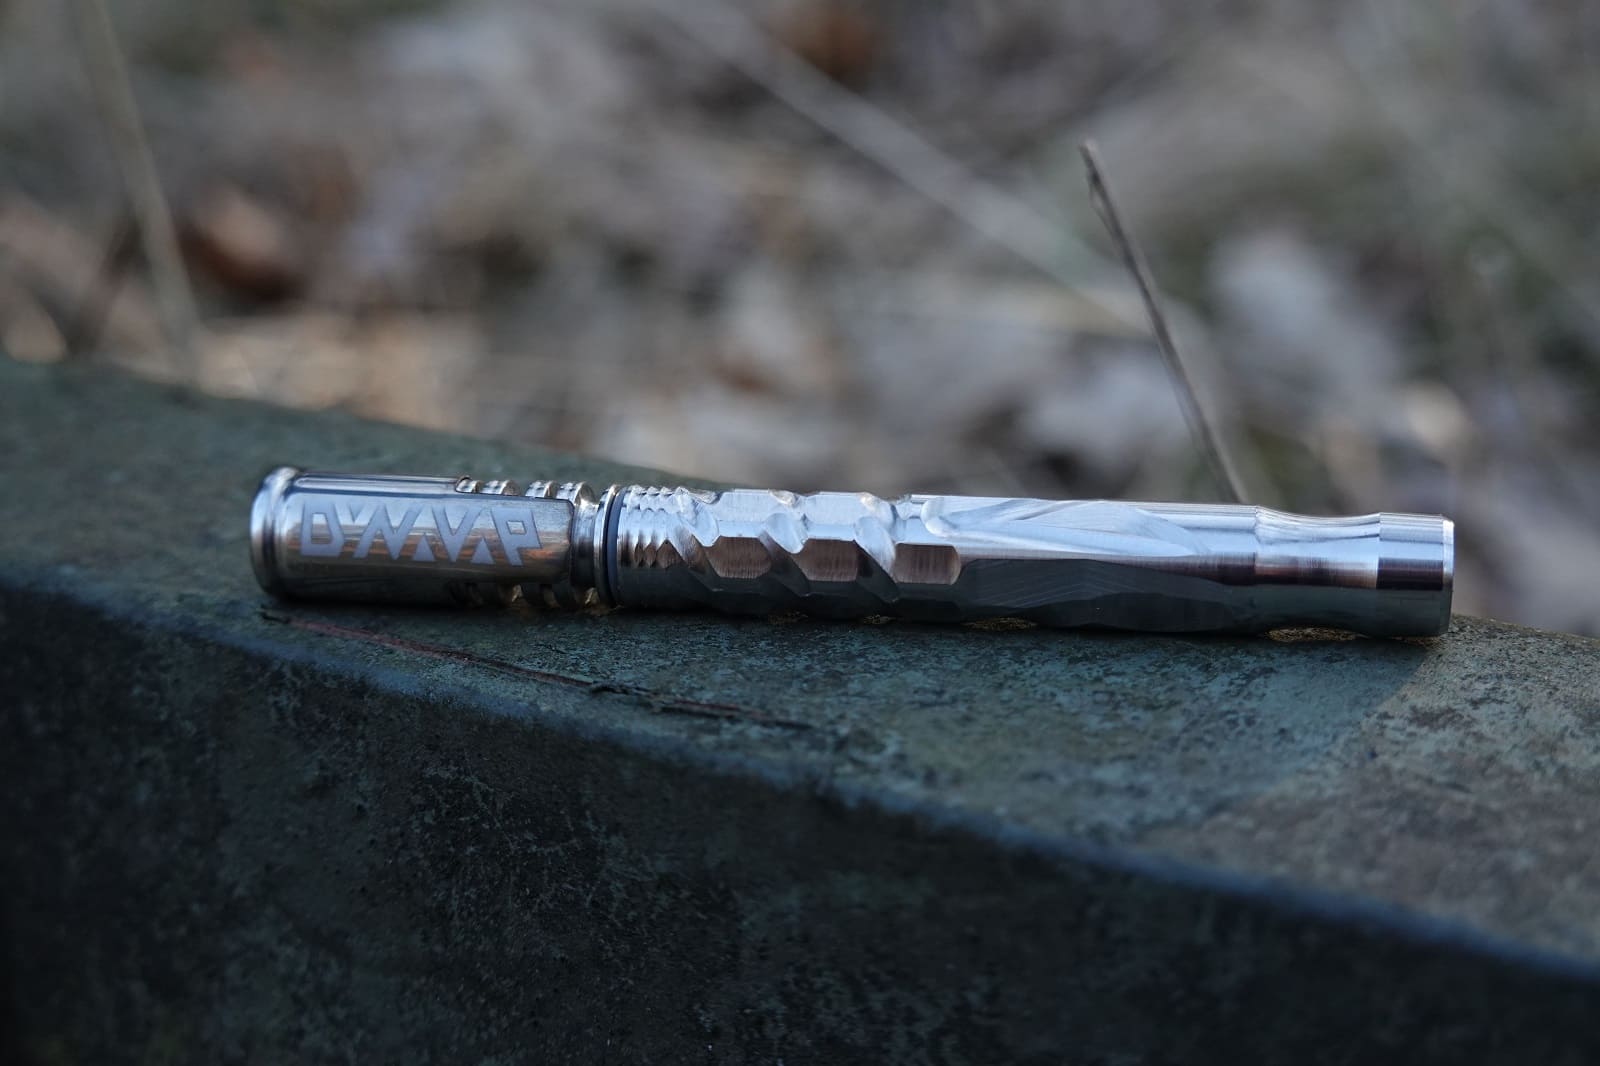
DynaVap VapCap Mis one of the most interesting vaporizers on the market. Small (its length is only 92 mm), made of stainless steel, operated with a cigarette lighter. Fans of post-marketing appreciate it for its high efficiency and impeccable taste. Here are some tips on how to properly use DynaVap VapCap M to further enhance your experience.
STEP 1 - Refilling the vaporizer with herbs.
First, remove the cap from your VapCap M. Note the notches on the tip, which are a new feature. They can improve the air flow as well as the refilling process itself.
Make upmaterial in the tip - you can do it by applying it with your fingers, or "dip" the tip into it. Whisk it gently in the chamber. After refilling, put the lid back on.
Correct application of the flame and its intensity are key issues in the process of using VapCap M. You can control itvaporization temperature, depending on where you put the flame. To illustrate this, there are three basic points of reference:
1. The closer you place the flame of the letter D (placed in the DYNAVAP logo on the tip), the lower the heating temperature and the better the taste experience.
2. The closer you bring the flame of the first letter A (placed in the DYNAVAP logo on the tip), the higher the heating temperature (there is a risk of burning the material here).
STEP 3 - Length of the flame.
The length of the flame is also important when using VapCap M. It is best to use a lighter for this purpose - a burner, which can adjust the length of the flame to about 1 centimeter. This will allow you to better control the heating process and minimize the amount of butane released during the session.
- Single stream burners are the best option for experienceexperienced VapCap users. They allow you to precisely control the heating process, because they do it point-wise, but they require the longest time to heat the lid.
- Burners with two jets heat up the vaporizer much faster, but in this case, the angle of heat delivery is much more important. The best setting is to place the vaporizer between the two streams. This will allow for even, though slightly slower heating. Parallel placement of VapCap M above the streams will significantly accelerate the heating process, but will reduce the heating precision.
- Three-jet burners are the best option for beginners as they combine a quick heat-up time with high precision.
- Burners with four jets are of course the fastest option for heating a vaporizer. They work well outdoors. When using them, place the appliance at the very tip of the flame.
STEP 4 - Rotating the vaporizer during the session.
Rotating the vaporizer while the burner is in place is very important in the process of heating the material. Hold VapCap M with the mouthpiece inside your hand. Then grasp the notched part with your thumb and forefinger. This arrangement will allow the device to rotate freely, andthus for even heating.

STEP 5 - Listen for the click!
VapCap Mit has a built-in thermometer that informs the user when the appropriate temperature is reached and at the same time lets you know that it is ready for use. This is accompanied by one or two clicks. This is due to the built-in disk in the tip of the device. Take a few breaths to hear the clicks again, this time letting the device cool down. The steel used in the device usually remains hot for 20-30 seconds. Following these recommendations not only simplifies the entire vaporization process, but more importantly, reduces the risk of material burning.
STEP 6 - How to use the "clutch".
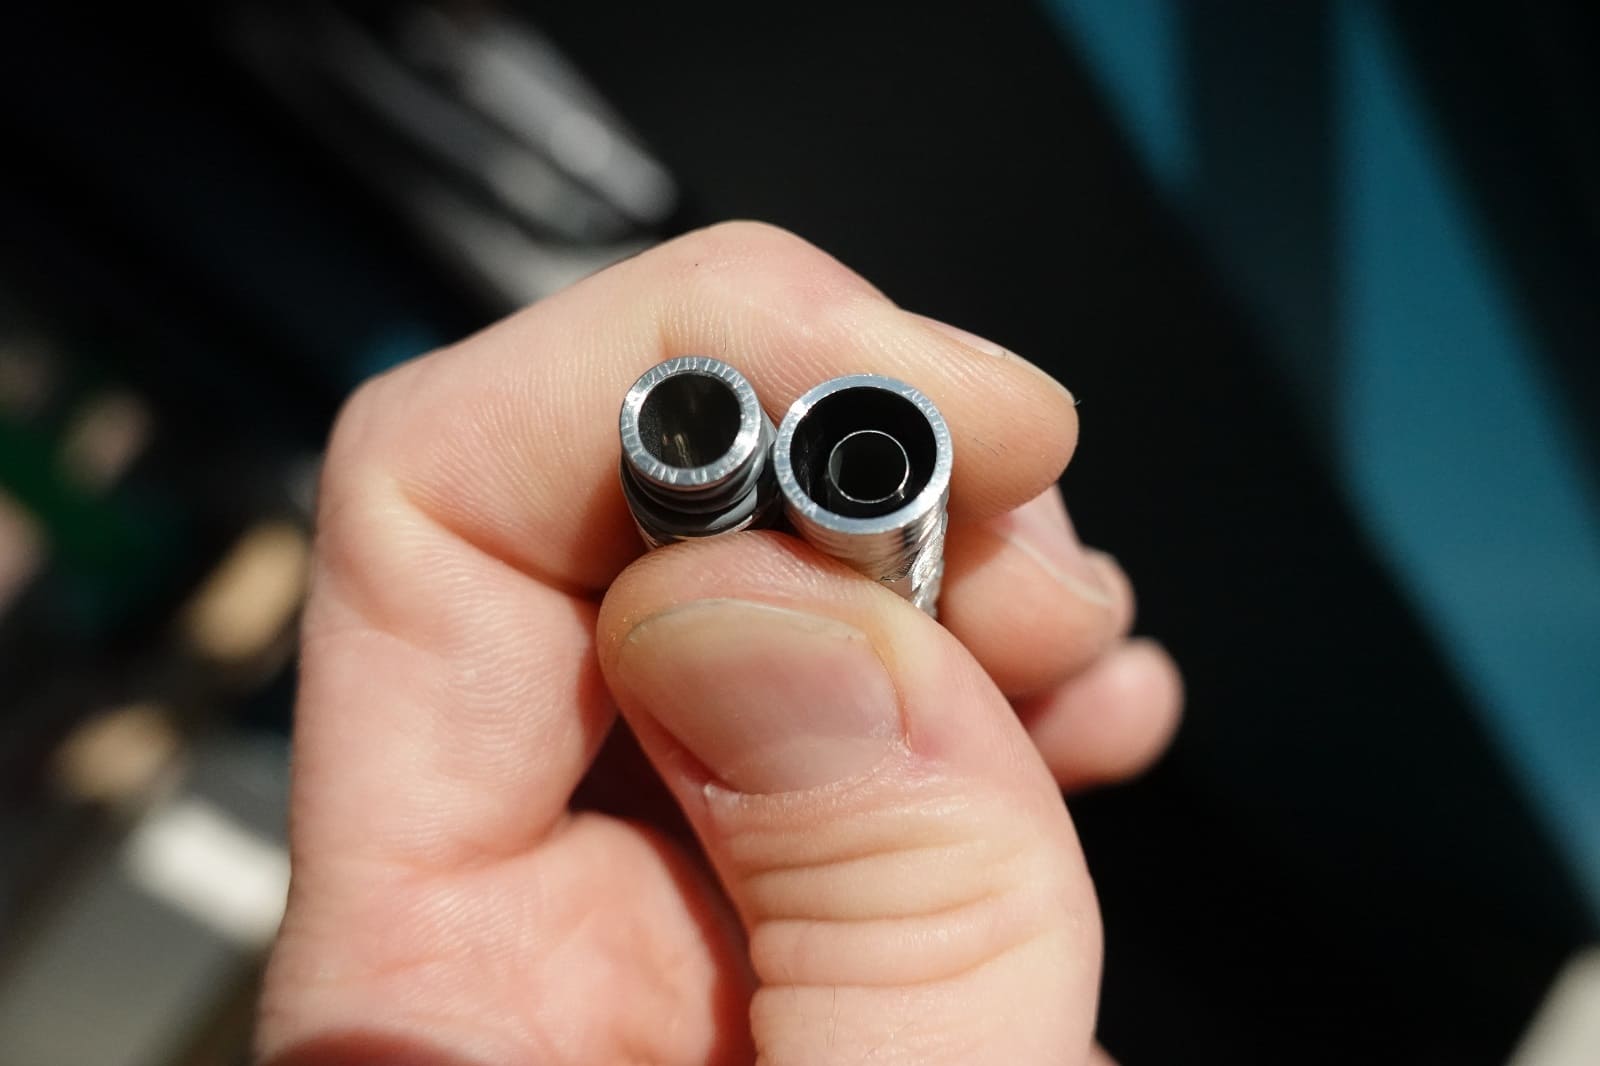
VapCap M features a so-called "clutch" (Turbo hole) - a hole generally found in water pipes. The clutch allows for the accumulation of vapors and then, when released, they strike with double force. By revealing or covering the opening, you can regulate the intensity of vaporization. Performing these activities at the right rhythm and pace will allow you to choose the amount of steam, depending on the individualu ual needs and preferences. The more you accumulate in the device's condenser, the harder you will feel the blow during inhalation. Similarly, the greater the "draft" you apply, the more subtle the sensation will be.
STEP 7 - VapCap M paired with a hookah.
Statement VapCap Mwith a hookah is very simple. The only requirement is to buy an appropriate adapter that will enable this combination. Currently available on the market are rubber adapters (aptly named Fat Mouthpiece) and glass (420vape). Both types allow the transition from a 10 mm ground joint to a 14 mm ground joint and fit the female end of the pipe. If you have any questions, please consult the store staff who will be happy to explain how to fit the VapCap M adapter to the hookah.

STEP 8 - Device maintenance.
Every vaporization enthusiast knows how important it is to keep your device clean. Regular cleaning of the vaporizer not only has a huge impact on the taste sensation, but is also invaluable in terms of device durability. In the case of VapCap M, one of the most importantIn other words, cleaning the heating chamber while it is still warm allows the walls to be cleaned more thoroughly. For this purpose, it is best to use a regular cotton bud and isopropyl alcohol with a solution of 91-99%.
Step-by-step cleaning process:
1. Dip the swab in a little alcohol and wash the chamber walls first.
2. Then, rinse the entire device from the inside. For this purpose, it is best to use another stick, soak one end, but leave the other dry.
3. Next, starting with the damp tip, pull the stick through the entire length of the device, and use the dry tip to polish and dry the inside of the device.
The entire operation will take no more than a few minutes, and as a result, you will get a very well-cleaned and preserved vaporizer that will be able to be enjoyed "like new" for a long time.Important: Do not use alcohol to clean the VapCap lid. A completely dry cotton swab is sufficient for this purpose. Before the next use, make sure that all parts of the device are dry.

As this article shows,there are several issues that significantly affect the comfort of use and the quality of vaporization DynaVap VapCap M. As it is a manual vaporizer, we do a lot of things here "by feeling" and it's worth observing what brings the best results. By using VapCap M, each user can adjust the temperature, heating speed and inhalation intensity to their individual needs. Without the use of electronics and batteries. Only you, your DynaVap and your lighter. And this is the greatest fun :)
Comments (